Using VS Code with Git Integration
Looking for a guide to help you get started using Visual Studio Code with GitHub or some other version control system? In that case you are in a right place.
Visual Studio Code is one my most used code editors and one thing that I really like is, it’s integrated source control and support for git builtin. All I need to get started is git. In this post I’ll show you how to setup source control for GitHub repository and how to use VS Code for daily use.
Configuring Source Control
Let’s fire up VS Code and head up to Source Control view, either clicking the appropriate menu option or using a shortcut (Ctrl+Shift+G). If git isn’t installed, you can go ahead with downloading and installing git.

If you had to install git, you should restart VS Code and head back to Source Control. You’ll see that VS Code has now detected the installation.
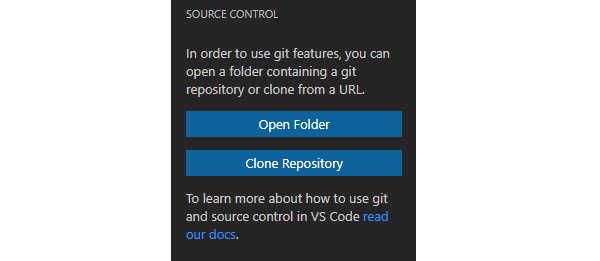
If you already have a folder containing a git repository, you can go ahead and click the Open Folder option. I don’t, so I’ll choose Clone Repository. Once selected, Command Palette prompts me about the URL of the repository. Mine is in GitHub, so I’ll choose that option. It’s possible to use other version control systems, just enter the URL for the repository.

GitHub extension needs access to my repo, so I’ll authorize it and sign-in to GitHub as well. After authorization, I’m redirected back to VS Code.

After that, I can select the repository I want. In this case it’s tmarjomaa/building4. Your’s will be different of course, depending on which repositories you have access to.

VS Code will ask you for a location where you want to clone the repository. Select a suitable folder and wait for the synchronization to finish. After the clone is ready, you can go ahead and open the cloned repository.

Well done my friend, you have now configured VS Code’s source control to work with GitHub repository. Next up, some common use cases for daily work.
Create a new branch
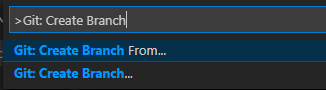
You can create a new branch directly within VS Code through Git: Create Branch and Git: Create Branch From commands in Command Palette (Ctrl+Shift+P).
All we need to do, is give a name for the new branch. VS Code will create the branch and switch to the new branch. If you check the status bar from VS code, you can see that new branch has been created and VS code is now using it. In this case the branch name is bugfix/issue5.

If you click the status bar, you can easily switch to another branch. You can also access the same option by selecting Git: Checkout to command in Command Palette.
Stage, Commit and Push
Let’s go ahead an make some changes. I created a new file with a name 404.html. As expected, VS code identifies this new file and let’s us view diff of the files. As this is a new file, there isn’t much to compare.
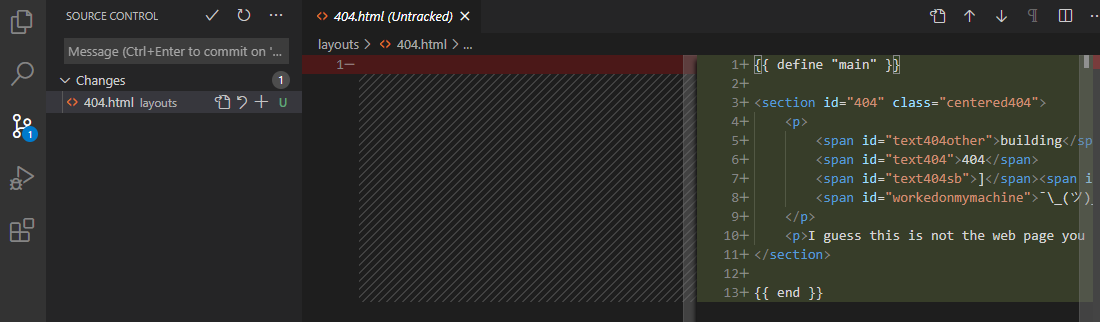
Because the file is new, it’s status is Untracked. Let’s change that. We can stage the file by clicking the “+” -sign.

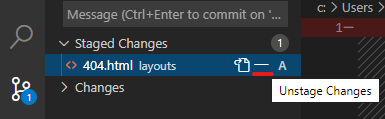
The status of the file changes, and we can also see that it’s now under Staged Changes. To unstage the file, we can just click the “–“-sign.
Let’s not unstage the file. Instead, let’s commit the change. We can do that by giving a proper commit message and clicking the checkbox sign or by pressing Ctrl+Enter.
In case you haven’t already configured user.name and user.email for git, VS code will complain about it. In that case, head up to Terminal in VS code and configure them by running:
$ git config --global user.email "you@example.com"
$ git config --global user.name "Your Name"
We can publish (Push) the code to GitHub by using additional Actions that can be found from More Actions … menu.
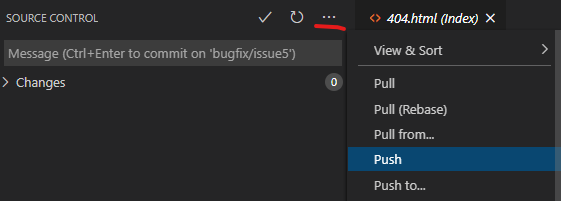
If there is no upstream branch configured, VS code will inform us about it, and asks if we want to publish the code. We can do that, and VS code will set upstream branch for us in the background. This will push the code up to GitHub.
Working with pull requests and issues
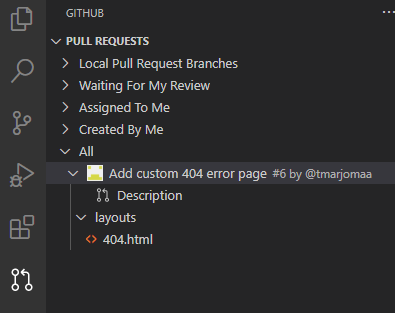
If we want to work with pull requests and issues within VS code, you first need to install additional extension, GitHub Pull Requests and Issues. Just head up to extensions view in VS code by pressing Ctrl+Shift+X, do a search for the extension and click install. (And by the way there are lot of usefull extensions available. I suggest you spend some time on browsing the Visual Studio Marketplace).
After installing the extension you need to sign in and authorize the extension as you did earlier when cloning the GitHub repository. After that, you can access open issues and pull requests through the extension.
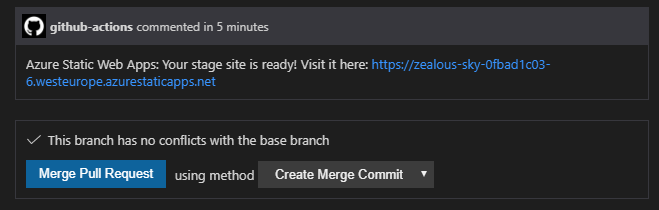
If everything looks good after build, tests and validation, pull request can be merged.
I hope this has given you enough information to get started with VS code and Git integration. You might also want to check my git cheat sheet to learn more about common git commands.
Want to know more or leave a comment? Did I miss something? Reach out to me on LinkedIn or Twitter.
Over and out.